


It all began with some old ceramic tiles that needed a fresh new look.
I had always wanted to try using a stencil and paint to bring new life to these tiles. I started searching for some tile stencils online and came across this pattern that I couldn’t resist!
I bought some mini paint samples from Home Depot and ordered a few colors I loved from Clare Paint.
In the end…I’m glad I went for it! I highly recommend painting your tiles!!
Check out the process here.
How to paint tile or vinyl floors.
Step 1
Clean, scrub and sand. To prep the tiles for the primer, I used a small scrub brush and a few drops of dish detergent mixed with hot water to remove all the grime and dirt from tiles and grout.
Once the tiles were clean, I sanded the tiles with my orbital sander using a 120 grit sanding pad.
Step 2
Vacuum. Be sure to remove all the dust and dirt. You don’t want any dirt getting into your primer.
Step 3
Prime the tiles. I used Zinsser BIN primer, a paint brush, and foam roller to apply the primer to the tiles and grout. I first applied primer using a paint brush along the border of the floor and grout lines. Then I went in with my foam roller and rolled each tile surface. I found this worked best for getting full coverage in all the nooks and crannies.
Step 4
Vacuum the tiles and repeat step 3.
Step 5
Let that primer cure! I waited 2 days before painting my base color on the primed tiles. I wanted to really let the primer cure and adhere to the tiles as much as possible before painting the base coat and pattern.
Step 6
Paint first coat of base color. In the same way I applied the primer (paint brush and roller combo) I also applied the first coat of my base color.
My base coat color : On Point by Clare Paint. I love this paint because it’s low VOC and has a high quality finish. (The paint I chose was an interior latex paint in an eggshell finish.)
Note * You don’t have to use a special outdoor paint or masonry paint for this. I talked to my paint consultant at Home Depot who said proper priming and sealing was the most important steps in making a lasting finish.
Step 7
Apply a second coat of base paint color. (Vacuum again first.)
Step 8
Stencil away – but practice first!! I used a stencil from Cutting Edge Stencils and Behr interior paint (eggshell finish) color Distant Land for the stenciled area color. Before I jumped right into stenciling the floor tiles, I practiced on some extra tiles I bought at Home Depot. I looked for the cheapest tiles that matched the size tiles I had and practiced priming, painting, and stenciling them. All in all, I spent about $5 on the extra tiles. They were .70 a piece and definitely worth it!
Stenciling: Using a brush and/or roller for the stenciling honestly wasn’t going good on my test tiles. I decided to trace the pattern with pencil and hand paint the tiles with my brush and some painters tape for the straight lines.
Step 9
Soften the look and add dimension. * This step made ALL the difference in achieving a clay tile look.* I used some of my base color (On Point by Clare Paint) and stencil color (Distant Land by Behr Paint) and mixed them together with some water creating a “white wash”.
Using a paint brush and rag, I went into each dark tile section and dabbed a touch of the paint mixture, then blended it in with the rag. This really gave the tiles a hand made look which is what I was looking for.
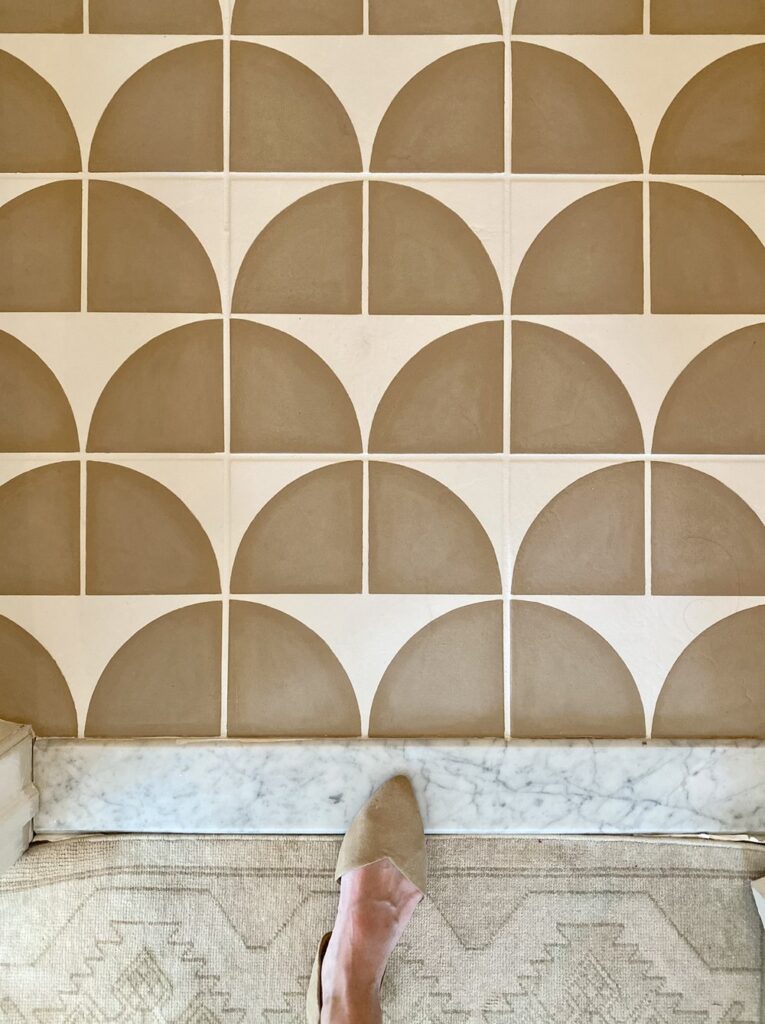
Final Step
Seal the tiles. After letting the paint fully cure for a few days, I used a matte polyurethane to finish off the floors. I applied two coats of poly using a brush and foam roller.
*When applying the sealer, be sure to vacuum first.* Also check the label for recommended dry times in between the first and second coat of sealer.
Polyurethane vs Polycrylic. For a stronger bond, I used Polyurethane to seal the floors. However, I have heard that the Polyurethane can yellow over time. Using polycrylic is safer if you are worried about yellowing but may not hold up as well as a polyurethane. I suggest sealing the tiles once a year depending on the amount of traffic the area gets.


