If you’re like me, you’ve probably found yourself in a situation where your kid’s room starts to feel like a cluttered play zone instead of a productive space. Between the piles of toys, sports equipment, and school books, it’s easy for things to get chaotic. But as my son’s interest in gaming and schoolwork grew, I realized it was time to rethink his space. So, I came up with a simple yet genius solution: turning his closet into a desk and gaming area!
Why a Closet?
At first, you might be thinking, “A closet? Isn’t that a bit cramped?” While it may seem unconventional, turning a closet into a dedicated workspace can actually be the perfect way to save space while giving your child a focused, organized area to do homework and games. Plus, it provides a designated “zone” that’s separate from the rest of the room, helping with both concentration and organization. With a little creativity and a few trips to the hardware store, I turned it into a fully functional and stylish desk setup that my son absolutely loves.
Planning the Transformation
Before diving in, I took a step back to think about how my son would use the space. He needed:
- A comfortable desk for homework and gaming
- Good lighting so he could work and play without straining his eyes
- Storage for books, gaming accessories, and art supplies
- Enough space for his gaming setup, including his laptop, monitor, and gaming console
Once I had a clear idea of what I wanted, I started sketching out a plan. Here’s how I transformed that underutilized closet into a functional and fun gaming/work space, and what I used!
Materials Used
- ½” oak for supports
- ½” plywood for shelf
- ½” oak planks for backsplash
- ½” oak for desk top
- Painters tape
- LED lights
- Storage cabinet
Step-by-Step Guide
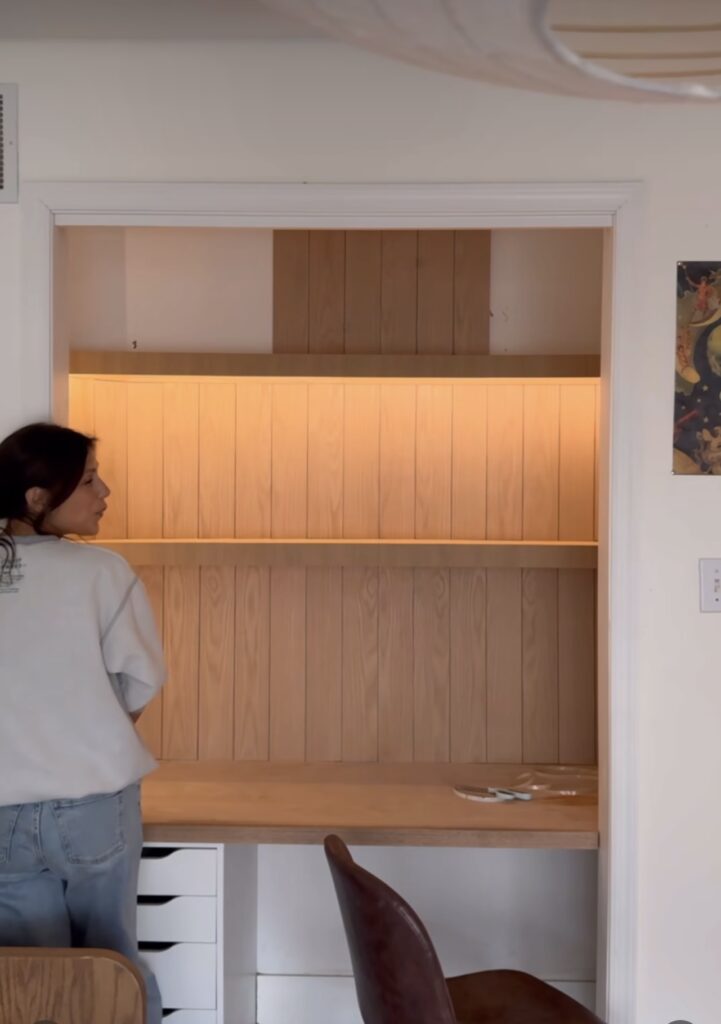
- Clear Out the Closet:The first step was to clear out the closet. I took everything out and gave the space a good cleaning. I then measured the dimensions carefully—this was key in making sure the furniture and gaming gear would fit without feeling cramped. I also went and unscrewed and removed the hanging rack.
- Make Desk: I first added the drawer storage in the closet but it wasn’t fitting the way I wanted it to so I decided to remove some of the trim on the bottom for the drawers to fit in perfectly!
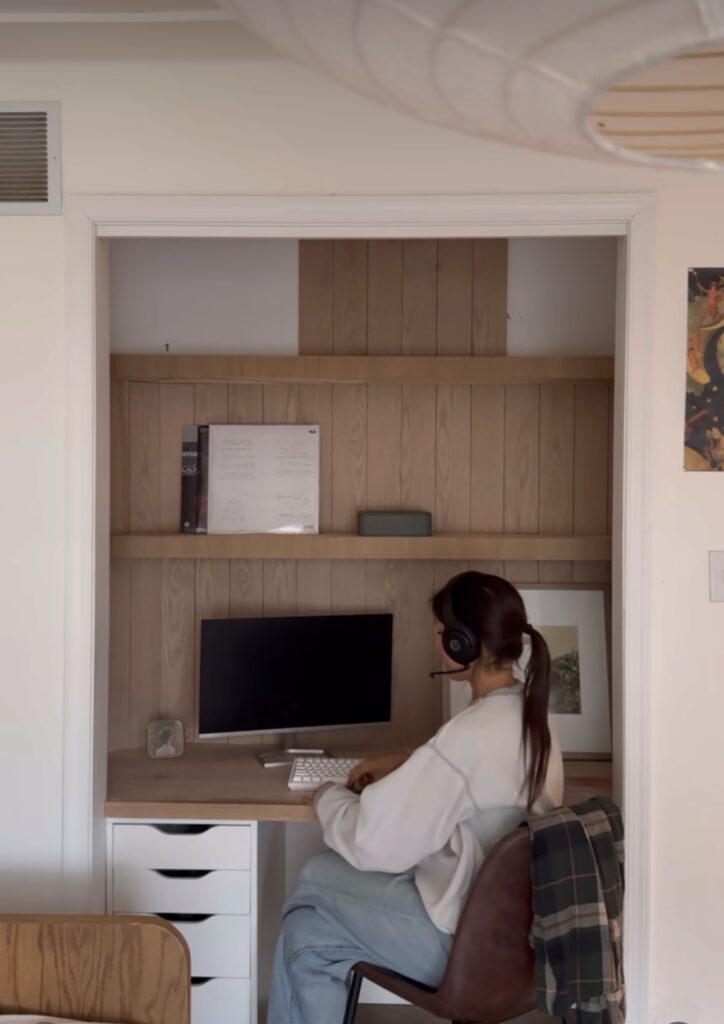
- Install the Desk: I wanted to make a wide enough surface to accommodate his laptop, a gaming monitor, and room for other essentials like notebooks, headphones, and his keyboard. If you’re working with a smaller closet, you could go for a fold-down desk or wall-mounted desk! Then I used my 2 pieces of ½” white oak to make the desktop, then added a piece of trim on the front to make it look complete. A trick I love to use when working with a nail gun is to put painters tape on the surface where I will be nailing and then once I am done I remove the tape and you can’t even tell there was a nail there!
- Install Shelves and Planking: I used ½” oak for horizontal supports for the shelves then ½” plywood for the shelf. I used ½” white oak planking for the backing, I lined up the pieces vertically and nailed them in, using my painters tape trick of course
- Lighting is Key:I added the Ecosmart LED strip lights around the edges of the shelves to give it a modern, gamer-inspired feel. These lights have an adhesive backing so all I had to do was find the perfect spot and stick them on! These lights add ambiance without overwhelming the space, and they can be changed to different colors for extra fun!
The Final Result
The transformation of my son’s closet into a desk and gaming area was a huge success. He now has a dedicated space where he can do his schoolwork, hang out with friends, and enjoy his favorite games. It’s cozy, functional, and stylish, all while being totally practical. Plus, the best part is, it doesn’t take up any extra space in his room!
It’s amazing how such a simple change can make such a big difference. If you’re looking for a way to optimize your child’s room without making it feel cluttered, I highly recommend considering the closet-to-desk conversion. It’s a great solution for creating a multifunctional, organized space that your child will love.
Now, every time he walks into his “new” room, his eyes light up. And honestly, that’s the best reward I could ask for.
Final Tips
If you’re thinking about trying this at home, here are a few tips:
- Measure carefully: Closets come in different sizes, so make sure your desk, shelves, and other furniture will fit comfortably.
- Personalize the space: Let your child add their own flair with posters, figurines, and other decor. It’s their space, after all!
- Keep it flexible: Use furniture that can easily be rearranged as your child’s needs evolve.
Turning a closet into a desk and gaming area is one of the best decisions I’ve made for my son’s space. Not only does it help keep his room organized, but it also gives him a place to focus, create, and have fun. If you’ve got a closet that’s just sitting there waiting for a purpose, why not give this idea a try?
