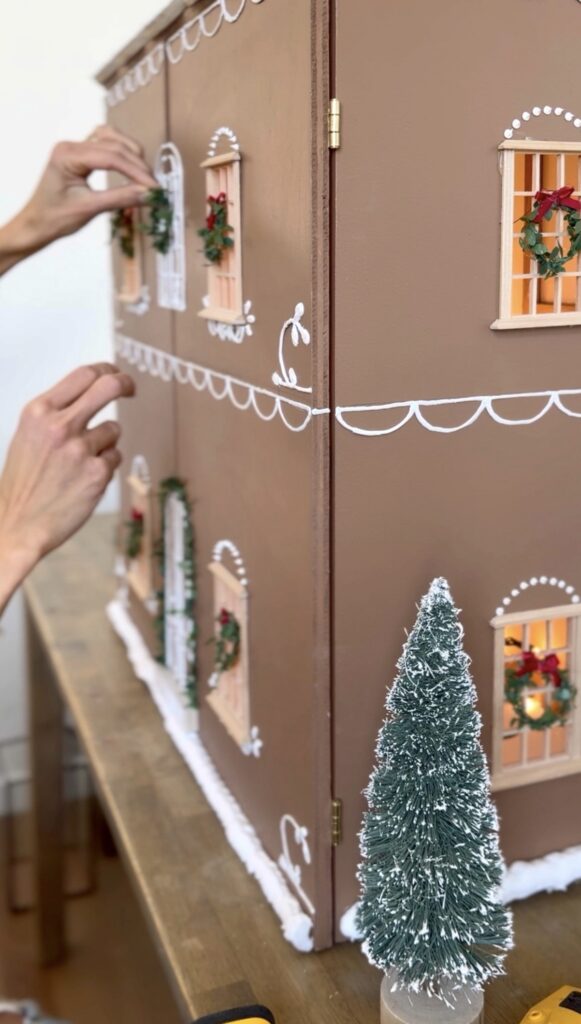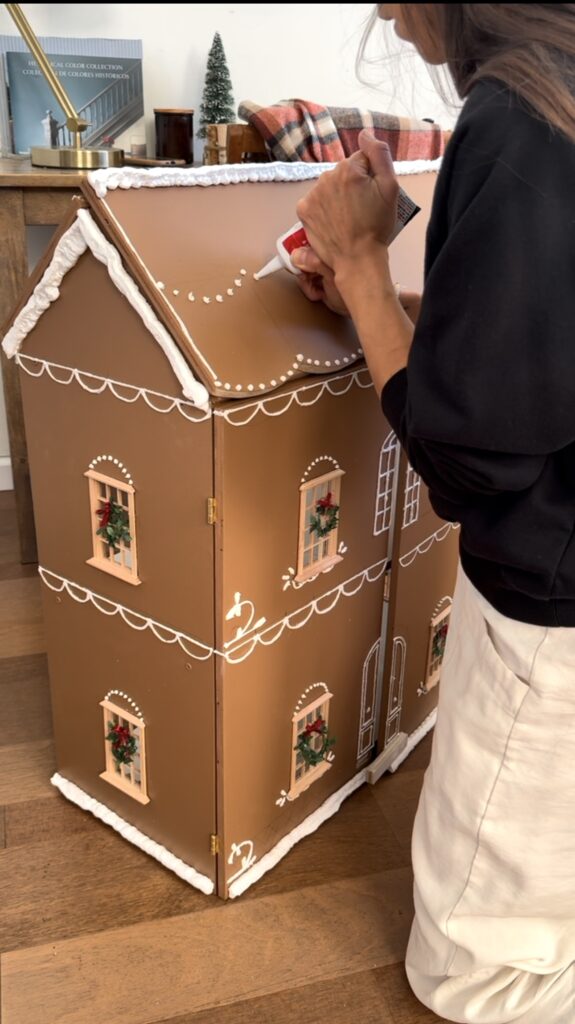
Creating a gingerbread dollhouse is a festive project that blends creativity and deliciousness! Inspired by my love for the holidays, I transformed a simple cube shelf from my basement into a charming dollhouse. Here’s how I did it!
Materials Needed
- 6-Cube Shelf: I found this gem in my basement
- Plywood: ½ inch for the doors and roof.
- Mini Vacuum: To keep my workspace tidy for my gingerbread people!
- Tools: Jigsaw, sandpaper, and caulk.
- Paint & Primer: I used this primer and painted with Behr Baked Sienna
- Flex Tape: To secure the roof.
- Spray Foam: For that cozy snow effect.
Step-by-Step Instructions
Step 1: Prepare the Shelf
I started by removing the top and middle dividers of the cube shelf. This created an open space for my dollhouse.
Step 2: Create the Roof
I traced lines for the roof pitch and cut along those lines. Using my jigsaw, I cut openings for the windows, ensuring my gingerbread people could peek out!
Step 3: Add Windows and Doors
I glued in the windows, making sure they fit snugly. For the doors, I cut pieces from the plywood and attached them later.
Step 4: Scallop the Roof
To give the roof a whimsical look, I decided to scallop it. I used a plate to trace the curves, creating a playful design that resembles icing!
Step 5: Sand and Prime
After assembling the pieces, I sanded the entire house down for a smooth finish and primed it with this primer.
Step 6: Painting
I painted the dollhouse using Behr Baked Sienna, giving it a warm, inviting look.
Step 7: Adding Icing Details
Using caulk, I added icing-like details around the windows and doors for that perfect gingerbread aesthetic.
Step 8: Secure the Roof
I used Flex Tape to secure the first roof. However, I later discovered that this might not have been the best choice!
Step 9: Nailing and Finishing Touches
Once the Flex Tape was in place, I nailed on the scalloped roof. To finish it off, I used spray foam to create a snowy effect on the roof.
Challenges and Solutions
While filming my reveal, the roof started to come apart—thanks, Flex Tape! This taught me to double-check my materials before the big reveal. Sometimes, things don’t go as planned, but that’s part of the fun!
Conclusion
This DIY gingerbread dollhouse was a delightful project, filled with creativity and a sprinkle of chaos. I learned that while yes this did end up falling apart, it’s the thought that counts and the real gift was that my daughter was able to be home in time for christmas. I hope you feel inspired to create your own! Share your experiences or any tips you have for making gingerbread homes in the comments below.
