The holiday season is all about anticipation and joy! One of my family’s favorite things to do each year is countdown the “sleeps” left until Christmas morning! What better way to countdown than with a DIY Advent calendar? Not only does it serve as a festive decoration, but it also builds excitement for Christmas Day.
Why a DIY Advent Calendar?
Store-bought Advent calendars can be charming, but a DIY version allows you to customize it to your taste and style. You can fill each day with meaningful surprises—whether it’s small treats, heartfelt notes, or fun activities—making the countdown to Christmas even more special.
Why I Chose a Faux Birch Branch
Using a faux birch branch adds a natural, rustic element to the decor while providing a sturdy and visually appealing foundation for the calendar. It’s lightweight, easy to hang, and brings a bit of the outdoors inside, perfect for the festive season.
Materials Used
- Base: Faux birch branch
- Hanging Method: String
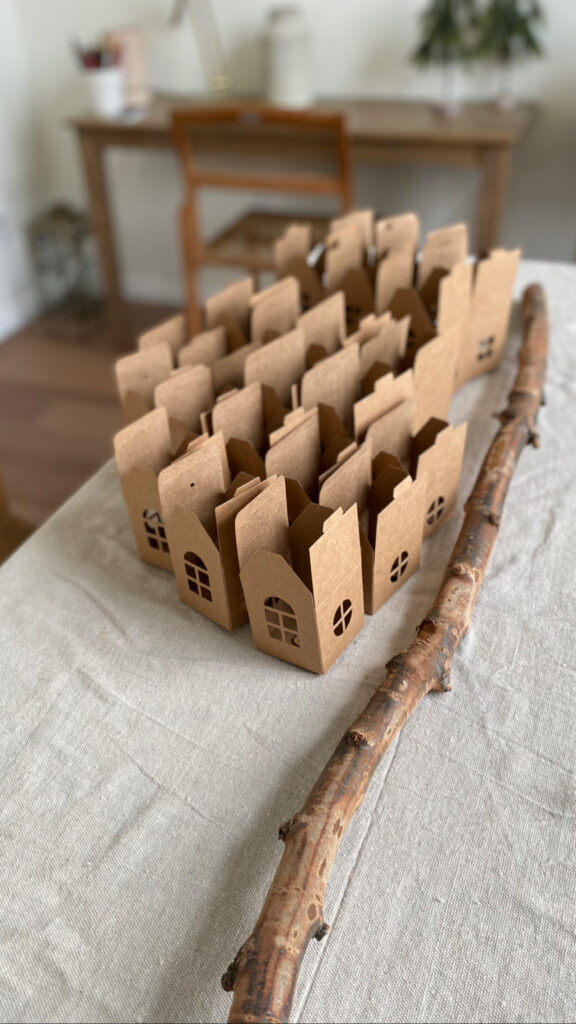
- Tiny Houses
- Treats: Family favorites (think chocolates, candies, or homemade goodies)
- Number Tags: Stickers with numbers 1 to 24
- Decoration: Leafy garland to wrap around the branch
Step-by-Step Guide
- Assembling my houses- I used pre assembled paper houses for easability and convenience
- Filling with Treats: Once the houses were ready, it was time to fill them with treats! I chose my family’s favorites, ensuring there was a delightful surprise behind each door. This personal touch adds a layer of love and thoughtfulness to the countdown.
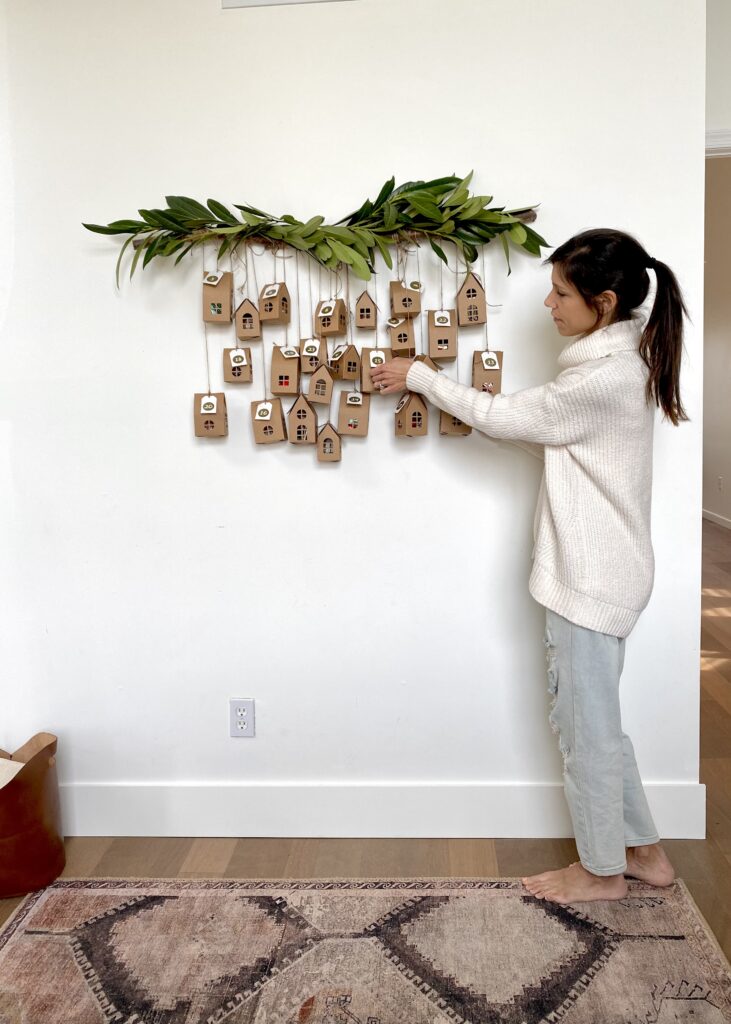
- Adding Number Tags: To keep track of the days, I used numbered stickers to label each house. This simple yet effective detail builds excitement for what’s to come each day.
- Hanging the Houses: I used string to hang the little houses from the faux birch branch. This gives the display a lovely, cascading effect. I spaced them out evenly, ensuring each house was visible and easily accessible.
- Wrapping with Leafy Garland: The final touch was to wrap the faux birch branch with a leafy garland. This added a festive pop of color and a natural element that perfectly complemented the overall design.
Tips for Success
- Get Everyone Involved: Make this a family project! Let each member choose surprises to include in the calendar.
- Be Mindful of Allergies: If you’re filling your calendar with treats, keep in mind any dietary restrictions or allergies.
- Mix It Up: Vary the type of surprises to keep each day exciting. Some days could be sweet treats, while others could be family activities.
The Joy of Anticipation
As you countdown your sleeps until Christmas, your DIY Advent calendar will not only bring joy through its surprises but also create lasting memories. Each day offers a moment to pause, reflect, and enjoy the season’s magic.
Happy crafting, and may your Advent calendar bring you and your loved ones joy and excitement throughout the holiday season!


